First you need some daylilies that you enjoy. You can buy them most anywhere, locally and online. You can bid on them at auctions, buy them, trade for them and sometimes even get them for postage. I do suggest you get them from daylily people that specialize in Hemerocallis. Once you have several that you like, the sky is the limit!
We have to start with some basic knowledge. Don't run away because this is going to be easy! For the most part, there are two types of daylilies- Diploids and Tetraploids. Diploids (nicknamed Dips) have 22 sets of chromosomes and Tetraploids (nicknamed Tets) have 44 sets of chromosomes. I'm going to spare you all the technical and scientific garble and skip right to the chase. Since this is a very basic tutorial, all we need to know is that you can only cross a Dip to a Dip and a Tet to a Tet. Yes, there are exceptions and fine print but let's forget that for now.
So, how do you know if your daylilies are Dips or Tets? It's simple! There are several ways to find this information and I'll give you some links to get you started. For these sites, you need to type in the name of the daylily and check the ploidy (Dip or Tet). Favorite sites-first off we have the Plant Files at Daves Garden. http://davesgarden.com/guides/pf/ Another site I like is www.tinkersgardens.com And last but not least-the final word on registered daylilies is the Registered Cultivar list of the American Hemerocallis Society. http://www.daylilies.org/DaylilyDB/ I actually write Dip or Tet on my plant tags because it makes it easier for my kids. And trust me, kids love to make their own crosses and seeds! If you have a daylily with no name, you obviously cannot look it up and find out the ploidy. In this case, you can try crossing it to known Dips and Tets and figure it out yourself!
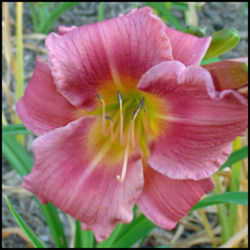
 Okay. You know your Dips from your Tets. Now what?? Let's start with only the parts of the daylily that concern us. Each daylily has six stamens and one pistil. You will find pollen on the stamens-it's the yellow-orange powdery stuff. Our goal is to transfer the pollen from one plant to the pistil of another plant. You can do this with a small paint brush or pinch the stamen off and carry it to the other plant.
Plant A, which grows the seed pod, will be the mom plant and Plant B will be the pollen donor. This is important when you label your crosses so you can keep track of them and monitor crosses that you like. Take a stamen from Plant B and rub it on the pistil of Plant A. Voila, you have your first cross that should be labeled Plant A x Plant B. The seeds will form on Plant A and will always be the first name of your cross.
If your cross is successful, you will see a small green pod start to form where the spent flower was. You can snip off the mushy or dried flower after a day or two, leaving about ½ inch close to the stem so you don't accidentally cut off your new babies. If you tug on the old flower, you might rip off your new seed pod.
 Making new daylilies can be very fun and rewarding. It's easy enough for the novice gardener and children alike. More and more people are turning to hybridizing because it's fun, easy and a never ending source of new plants.
On a good note, even if one of your new babies screams ugly to you, there is always someone that will think it's a beauty. If you are giving away daylilies, you will never run out of friends.
Signed with grins, and LOTS of seedlings,
Michele

Disclaimer: There are many professionals out there that make their living hybridizing daylilies. There are also many hobbyists that do it for fun and/or money. Most have many years involved in this, much practice, a LOT of scientific studies, trial and error and they "cull" a lot of seedlings that did not meet their goals. It takes a lot of time and investigation, figuring out which parents give which traits. I mean not to make light of hybridizing but want the rest of you to know that it's a lot fun and you can do it too!
Top photo was taken at Thoroughbred Daylilies in Paris, Kentucky.