(Editor's Note: This article was originally published on October 11, 2008. Your comments are welcome, but please be aware that authors of previously published articles may not be able to promptly respond to new questions or comments.)
Jams and jellies are delicious as spreads on sandwiches and toast. They are used as sauces or glazes on meats, duck and poultry, and as fillings in baked goods, such as: layer cakes, jelly rolls, rugelach, oatmeal jam squares, linzer tortes and thumbprint cookies.
Tip #1: DO NOT CHANGE THE RECIPE!
 My husband and I had patiently waited the first few years while our newly planted red grape vine, Vitis labrusca, got established. By the third year we had our first bountiful harvest. Since we had over seven pounds of grapes - much more than the recipe called for - we doubled the recipe.
As we were mixing the grape juice and the sugar, I instinctively tasted the mixture, which seemed plenty sweet after the first several cups of sugar. We reduced the sugar by just a cup or so. This seemed logical, as our family is very health conscious. All seemed to go well...until we opened our first jar and discovered that our jelly had not gelled.
Doubling the recipe and reducing the sugar were our first beginner's mistakes.
Sugar Science
Sugar has important functions besides adding the sweetness to jam or jelly. Molecular reactions that occur between the sugar, acid, juice, natural salts and pectin make the liquid gel. When used in a high enough percentage, sugar also limits the growth of microorganisms. Salt does this too, which is why it was often used in ancient food preservation practices for foods such as meats and fish.
The amount of sugar may be reduced by using fruits high in natural pectin, longer simmering time to reduce and concentrate the natural pectin in the juice, adding low methoxyl pectin, or by using specific "no sugar needed" pectins.
|
Lessons learned: Beware of trying to make low sugar jam or jelly, or replacing the sugar with honey or artificial sweeteners without using a tested recipe; it may not gel. And, if you have more fruit or juice than the recipe calls for, make several batches, rather than doubling or tripling to make one huge batch. The volume of the batch will affect the structure of the gel. There are many variables in making jam or jelly that require a balance of all the ingredients for a gel to form. For best results, follow a tested recipe. |
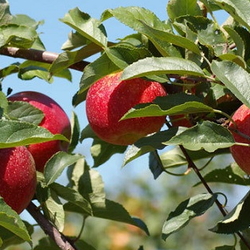
 Harvest your Grapes or Berries
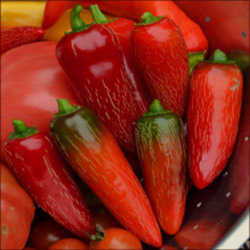
We happened to use red grapes, but you can make jam or jelly from other fresh-picked fruits or berries from your garden. You can even make jelly from unsweetened fruit juices, watermelon, lemon or savory pickings, such as fresh mint, rhubarb, ginger or hot peppers.
Tip #2: USE PECTIN
In our failed effort, not only did we reduce the amount of sugar, we also didn't add pectin. Pectin is a natural substance found in fruit that enables fruit juice to set up and form a gel.
Some fruits, when heated in a limited amount of water, contain sufficient natural pectin within them to make a jelly. [1] The level of pectin varies depending on the ripeness of the fruit. To make a good jelly without adding pectin, a recipe will often call for adding some unripe grapes along with the ripe grapes, usually in a 1/4 to 3/4 ratio.
We ignored that part in our recipe because we only had ripe grapes left on the vine at the time and we didn't understand why it would matter.
Not using pectin or including some unripe grapes in our batch was our next beginner's mistake.
Pectin and acid levels vary depending on the maturity of the fruit at the time of harvest, as enzymes begin to degrade the pectic substances. [2] Higher levels of pectin are found in tart apples, blackberries, crabapples, cranberries, currants, gooseberries, grapes (concord and wild), guavas, lemons, loganberries, boysenberries and most plums. [3][4] In general, fruits such as grapes, when very ripe, will contain less pectin.
Experienced jam and jelly makers may do a gel test or acidity test and may use less--or even eliminate--pectin, depending on the pectin levels in the fruit. A beginner will probably cringe at the thought of doing such tests, but by simply adding pectin to the recipe, they can easily succeed in first attempts at jam or jelly making.
Pectin will help guarantee that a desirable gel is formed. The molecules of pectin will interact with the amount of sugar and acid present and form a three-dimensional network within the fruit juice, resulting in a gel.
Pectin can be homemade and frozen for later use, but it is most often store bought. The recipe below uses powdered pectin, but pectin is available in other forms: liquid, or as low methoxyl that is activated by calcium.
| Lessons learned: Fruits, such as grapes, are lower in pectin the riper they are. Using all ripe grapes without added pectin may prevent your jam or jelly from setting up. Adding pectin lets you make jelly with fully ripe fruit. |
Jam or Jelly?
A beginner may find that making jelly is easier than jam. Actually, there are other choices too, such as preserves, conserves, marmalade or fruit butter. Compared to jelly, jam has chunks of crushed or chopped fruit in it, and the process involves a few more steps. Our first effort was to make grape jam. It was fun, although separating the skins from the grapes and removing the seeds were time consuming. The skins had to be chopped and added back to the juice, a process that took us half the day.
Only you can decide whether to start with jam or jelly.
Sealing your jars
Water-bath processing is necessary to form an airtight seal and preserve your product. After the jars cool, check that all lids formed a tight seal. To do this, gently press on the center of the lid. If you see and feel it pop up and down with movement, air is still inside the jar and a tight seal was not made. If this occurs on newly made jam or jelly, refrigerate the product. If you discover a popped seal on an older jar of product, discard and do not use it.
Paraffin wax is still sold and some people still use it as an additional method in sealing their product. However, it is no longer recommended or necessary. Paraffin wax on top of the jelly may cause surface mold, which may contain harmful mycotoxins. [5]
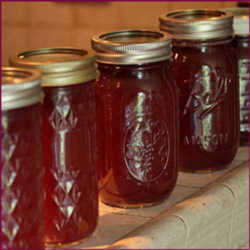
Success at Last!
This year we tried again and...tada! Beautifully gelled, delicious jelly for our family.
| Lessons learned: If at first you don't succeed, try, try again. If you end up with un-gelled jelly, save it and use it as a dessert topping! |
Recipe for Beginner's Grape Jelly:
|
Ingredients:
Most recipes are for one exact amount of juice, but what if you have less or more? In our second try at making jelly, we only had a little over 2 pounds of grapes compared to the over 7 pounds from the year before. It will always vary. This easy recipe is designed for beginners, using a one-to-one ratio for the measurement of juice and sugar, based on the amount of juice extracted from the fruit. Have fun!
1 If you really want to reduce the sugar, 1 cup juice to 3/4 cups sugar will also work. 2 This recipe was calculated using Ball® Fruit Jell® powdered pectin.
|
|
|||||||||||||||||||||||||||||||||||||

 |
 |
 |
 |
|
1) Prepare your fruit. Wash it and remove the stems. Don't worry about the seeds because they will be strained out in the cheesecloth. 2) Make grape juice from your grapes: In a pot, squeeze and crush the prepared grapes with your hands (this is the fun part!) |
3) Add water and simmer on high for 5 to 10 minutes to soften the grapes. Let cool. In the next step you will strain the juice. Some recipes call for letting it slowly strain for hours so the jelly is clear, if you have the time you may prefer to try that. We just squeezed it out right away and it seemed fine. |
4) Strain the crushed grapes in a cheesecloth over another pot to save the juice. Squeeze out as much juice as possible. Discard the cheesecloth with the seeds and pulp. Measure the amount of juice you have, then refer to the recipe and measure out the pectin and sugar needed. |
5) Sanitize your jars as previously mentioned. 6) Heat a skillet of water for your clean lids to keep them warm. I toss in the bands too, but you don't have to heat the bands. Do not bring the water to a boil, or it may prevent the coated edge on the lids from forming a tight seal. |
 |
 |
 |
 |
|
7) Add the pectin to the juice and stir over high heat until it comes to a boil. We used a whisk first, then switched to a wooden spoon for the sugar. Stir in the sugar and boil for one minute. Don't worry if it starts to foam, it is not necessary to skim the foam. Be careful, do not let it boil over! |
8) Ladle the mixture into your warm sterilized jars, leaving 1/4" at the top for what is called headspace. Wipe off any spills on the glass rims then put on the 2-piece lid and band. Use regular tongs to pick them out of the skillet (or a magnetic lifter - available from Ball®). To avoid contamination, do not touch or dry the lids; just place directly on the jars using the tongs. Dry the rings, then screw on. |
9) While the heat is still on low, use plastic coated tongs to gently lower the jars onto the canner rack. Be sure the water level is at least an inch above the jar tops. Cover, turn the heat back up to high. When it comes back to a boil, process for 5 minutes. |
10)Turn off the heat and remove your jars. Place them on a dish towel, or some prefer racks. You may start to hear popping sounds as the lids form an air-tight seal.Let the jelly sit undisturbed overnight. Label and store in a cool, dry place. Refrigerate after opening. |
Footnotes: Photos copyright © 2008 Wind. All rights reserved.
[1] [2] [3] Charley H, Weaver C. Foods, A Scientific Approach. Upper Saddle River, NJ: Prentice-Hall, Inc.; 1998.
[4] Ohio state University Extension Fact Sheet. Jams, Jellies and Other Fruit Spreads. Accessed: Aug. 26, 2008.
[5] National Center for Home Food Preservation, Making Jams and Jellies. Accessed: Sept. 23, 2008
Further Reading:
I called it Jellamy: Canning by Sharon Brown
Wonderful Wild Grapes by Lee Anne Stark
Turn Green Tomatoes into "Raspberry" Jam that's Fun for Kids to make and eat by Jill M. Nicolaus
Preserving the Bounty, A Summary of Food Preservation (part 1) by Paul Rodman
Related Links:
- Growing Grapes in the Home Garden - Horticulture Guide, Iowa state University
- Low Sugar Jam and Jelly recipes - Oregon State University
- Lemon Jelly recipes - Canning, Freezing and Drying discussion forum for Dave's Garden subscribers
- Preparing and Canning Jams and Jellies - USDA Complete Guide to Home Canning by Utah State University Extension
Visit: Dave's Gardens Bookworm: over 25 canning and preserving books listed!
- Ball Blue Book of Preserving by Alltrista Consumer Products