(Editor's Note: This article was originally published on December 18, 2008.)
Propagating African violets from leaf cuttings is simple and rewarding. A light soil mix, extra humidity, and patience are the keys to success. Soon you'll be on your way to filling your shelf with pretty little plantlets to share and enjoy!
The first step is to choose the leaves for your cuttings. Healthy, crisp leaves will produce the strongest plantlets the most quickly. When you trim old leaves from your plants, it's tempting to put them down for propagation rather than just tossing them out. Using leaves pruned from the fifth or sixth row of leaves can work, but older leaves often take longer to produce plantlets.
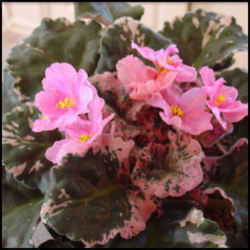
If your parent plant is a variegated variety, try to use leaves with as much green as possible for propagating.  A solid green leaf from a variegated plant will still have the genetics to produce variegated progeny, and it will have more chlorophyll to help feed the developing plantlets. For the sake of the appearance of the parent plant, I snap or cut off the leaves where they join the main stem. This will generally give you a leaf cutting with a much longer stem than you need for propagation.
If you are trading or sharing leaves, this is the point where you'll want to pop your cutting into a zip-top bag. Seal the bag shut with a little air inside, but not so much that the leaves will bounce around. There's no need to include wet paper towel; a plump leaf has enough moisture to stay crisp in the baggie for several days. If you're shipping the cuttings, include plenty of insulation in the package (shredded paper, packing peanuts) to protect them against temperature fluctuations.
Your next propagation step is to re-cut the leaf. New plantlets tend to start growing from the cut surface at the base of the stem. Sticking the leaf with a long piece of stem under the surface of the potting mix will work, but it will take longer for the plantlets to emerge from the depths of the pot. An inch or so of stem below the surface should be enough to anchor the leaf while producing plantlets more quickly.
To maximize the number of plantlets, try increasing the cut surface on the stem. There are two ways to do this. When you re-cut the leaf stem, cut it at an angle rather than straight across. This will expose a larger cut cross-section. In addition, you can lightly scrape along one side of the stem with your fingernail or with your knife. Don't mutilate the stem; just scrape it until the surface looks slightly "wet." New plantlets can now form at any point along the scraped portion of the stem.
 |
 |
.") |
 |
 |
 |
Fill a little pot with lightly moistened potting mix. For starting leaves, I usually use one part soil-less mix to two parts additional perlite, plus a few polymer moisture crystals. Some people have good success using straight perlite or vermiculite. Really good drainage is vital. When you first stick the leaf, it has no roots, so overly moist mix can rot the leaf. Plastic 3-ounce cups with a drainage hole make excellent leaf pots. With the smaller leaves of miniature African violets, I often use smaller 1-ounce cups or stick multiple leaves in a shallow container. Sterilizing your soil mix (click here for instructions) helps to reduce the chance of various problems.
 Stick the leaf. Sturdy stems can generally just be poked down into the soil, but you might want to use a pencil or skewer to make a little hole. Plant the leaf at an angle, with the cut or scraped surface of the stem facing up. This will let plantlets form closer to the surface of the soil mix, allowing them to emerge faster. Firm the soil mix around the leaf lightly, just enough to make the leaf stand up. Try not to let the leaf touch the surface of the soil mix or the edge of the pot. I don't usually water in the leaf, as overwatering is too easy.
Provide a high-humidity environment, especially if you live in a less humid area. The extra humidity will help keep the leaf crisp until it develops roots and can take up water. This is not a tricky thing. You can use anything to cover your leaf, as long as it lets in light and doesn't touch the leaf itself (condensation can rot the leaf). For single pots, a plastic baggie works well if you include a skewer or two in the pot to prop up the plastic. I have better luck if my humidity cover has a bit of an opening at the bottom or a hole or two to allow some moisture to escape. Water sparingly if the soil mix gets dry, and give the leaf pot light just as you do your adult African violets.
Now comes the hard part--waiting! Your patience will be rewarded when you spot the first "ears" as the new plantlets poke their developing leaves above the potting mix. Occasionally, I'll see ears in as little as two or three weeks, but four to six weeks is more likely. As long as a leaf looks healthy and crisp, don't give up on it. I've had leaves suddenly produce beautiful little plantlets after three months of waiting. Patience is the key.
 |
 |
 |
New plantlets need time to grow, so don't be in a hurry to remove them from the "mother" leaf. I like plantlets to have at least four good leaves before transplanting. I usually wait until the plantlets fill the pot and start looking really crowded before separating and transplanting them. You can find excellent additional information in the "sticky" thread at the top of the African Violets and Gesneriads Forum, as well as at commercial sites such as Rob's Violet Barn.
It's amazing to me that such lovely plants can be grown so easily - from a single leaf! I hope you'll give it a try.
Photos by Jill M. Nicolaus
Click the links in the text of the article for more information. You can move your mouse over the links to see where they'll lead.
Moving your mouse over the images will reveal pop-up captions.
Other articles in my "African violets 101" series include "Your New Plant" and "Watering 101."