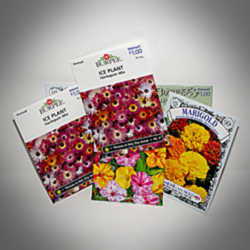
Excited by the cream-colored flowers portrayed on the seed packet, I chose to try ‘snowdrift' marigolds (Tagetes erecta) last spring. Here is the story of my flower bed in pictures, from seeds sown indoors to a bed in full bloom. 
(To quickly find your zone, click this USDA link. And here's a Dave's Garden zip code link with freeze/ frost dates that gives instant information about your specific city or town and length of growing season.)
Even though indoor seed starting is typically done in the winter, you CAN sow indoors within a longer range of time-don't stress if you want to do it but think you have missed your window of opportunity.
I started with Jiffy peat pellets.  Resembling thick, flat cookies with a dimple in the middle, peat pellets are compacted peat discs made from Canadian Sphagnum peat and wood pulp. They are designed for reconstitution with water for starting seeds and come in a kit (with tray and/or dome) or in refill packs. If space is limited, the refill pack of pellets is great for lining up your plants in a single row on a sunny windowsill.
(To rehydrate them, fill a cake pan with water—just enough—to cover the bottom of the pan and place the pellets in. Then, watch them grow! The dehydrated peat quickly soaks up the shallow water, rising upward into a cylindrical shape like magic.)
Into the wet peat pellets went the magic wand–looking marigold seeds, just barely covered with a bit of loose peat and gently tapped.
To germinate, I kept the seeds warm and moist. One trick for gentle bottom heat is to place the moist pellets on top of the refrigerator. The key is to carefully guard against drying or forgetting that they are up there. It's a "babysitting" time.
Once sprouted, the little plants were given a premium spot in my southern window and carefully tended to keep moisture levels constant. I watered them from the bottom, again filling a cake pan with about ½" of water and placing the pellets in until they absorbed it. Then back into the window they went. The idea was to keep them slightly moist at all times without saturating them or letting them dry out. This is especially important when the window is open and air is moving. You must watch over your little plants like a hawk, knowing that it's only for a week or two—They just need a little time to get big and strong enough for the next step.
Here is what the little seedlings looked like one week after sowing in the pellets, and again at two weeks:  |

Week four: Still in the windowsill, but change is about to happen!
Hardening off is the next step. It's another "babysitting" time where you place the little plants outdoors in a protected place for a few hours each day before transplanting into the flower bed. This gets those tender plants ready to handle sun, wind, and rain, like their bed-sown counterparts can. 
Mine went between some shrubbery on the east side of the house, away from wind and full sun. I would put them out in mid-morning, and then bring them inside again by early afternoon. After a few days of increasing their outdoor time, those soft little stems took on wiry characteristics and the leaves firmed up. I knew these flowers were ready when their stems became red.
Marigolds after five weeks on June 8: Planting Day. Time to transplant! (It was like a high school graduation for my young flowers.)  The young marigolds were tall, so I dug deep holes to help support their stems.


Marigolds all settled in bed and waiting to grow.
Below, the snowdrift bed after ten weeks. It is now July, and the long-awaited snowdrift blooms are about to reward me with a show. 
It was worth the wait!
Enjoying the fruits of my labors ... 


In summary, it is possible to have a beautiful marigold flower bed from indoor seedlings sown in mid-spring. Marigold 'snowdrift' was easy to germinate and practically maintenance-free. Though tall (about 2-2½'), they stood up to wind and rain, remaining erect and lovely throughout summer and fall.
Special thanks to:
Tamara Galbraith (Texas Tam), "Gardening in the Zone"
Diana Wind (wind), "Starting Seeds Indoors"
Jill M. Nicolaus (critterologist), "Seed Starting 101: Hardening off Seedlings Before Planting Out in Your Garden" and "Seed Starting 101: Planting Out - Tips for Transplanting Seedlings into Your Garden"
Photos by Timmy Jo Given (timmijo)