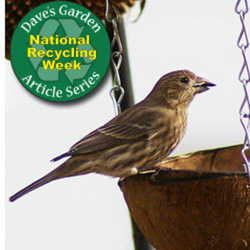
 North American gardeners love their hummingbirds. We hang our feeders early in the spring and anxiously await their arrival from Central America. Along with the feeders filled with sugar water, come the ants. We battle them throughout the season and gardeners world-wide battle them as well if they feed birds or wildlife any sort of nectar or fruit. This Frugal Gardener installment instructs readers on how to build an ant moat from everyday materials. Ants can't swim, so a water barrier is quite effective to control them.
You will need:
The cap from an aerosol can, like paint or hairspray comes in.
An old coat hanger. I chose one that had seen better days and was of no use for hanging clothes.
Wire cutters, hot glue gun (or silicone sealant) and a drill for making the hole.
This is an easy project and you can construct several moats in a short amount of time.
 Gather your materials. Any sort of caps with a good depth will work. The coat hanger is strong, but easy to work with. If you don't have a hot glue gun, then any waterproof glue will work, but you'll have to wait until it is dry to use your ant moat. |
 Drill a small hole in the center of your lid. I used a narrow bit, close to the same size as my coat hanger. If you don't have a drill, then you can heat the end of your wire until it glows hot and melt a hole. Be careful if you go that route...the wire will remain hot for awhile and can cause injury or burn. |
 Cut a length of wire at least twice the length of your lid. I liked the coat hanger with the cardboard tube because I had a ready-made hook at one end to start with. |
 Thread your wire through the hole in your cap. |  Bend a hook in the end of the wire you threaded through the cap. Make sure your hook is deep enough to hold the hook on the top if your feeder. It is easier to bend the hook before you seal the hole. That way, you do not risk harming your seal. |  Apply glue to the bottom of the cap, making sure that the wire is pulled through enough to allow you to hook it on your feeder top. Also apply your glue to the interior around the wire. You want to create a water-tight seal. If you do not have hot glue, silicone sealant for bathrooms and kitchens will work, but you will need to allow it to dry before using your moat. |
 Hold your wire in place until the glue firms up enough to keep it straight. The wire needs to be as close to vertical as possible to keep your water from pouring out. |  My feeder was up less than a week before the ants found it. They marched down the chain and helped themselves to the nectar. They do no real harm, it is just messy and I really don't like carrying an ant-filled feeder into my house to clean it. |  My Frugal Ant Moat is in place and foiling the plans of the hungry hordes. Just remember to keep water in your moat and to make sure that there are no other ways the ants can access the feeder. They're quite adept at finding a twig or leaf coming in contact with your feeder below the moat. |
My Frugal Ant Moat didn't cost me anything. I used materials that were destined for the trash, so it was the ultimate in recycling/upcycling. Stay tuned for another installment next month! Check out other frugal crafts and ideas at this link.


