Up until now, the Frugal Gardener series has concentrated on projects and tips that cost very little or nothing at all. This project is a bit different, since I needed more than just ‘pocket change' to construct it. However, it is still quite frugal and more than affordable for gardeners on a tight budget. This little water garden is perfect for a patio or deck and since it isn't permanent, is a good choice for apartment dwellers or renters.
In the winter, I purchased a large cast-iron wash kettle at an estate auction for $30. At that price, I was pretty sure that it had to be cracked and the plan was to use it for a planter in the garden this spring. When it rained and I discovered that it actually held water, plans changed. I didn't have a water feature in my garden and this was a perfect container for the project. Through the winter, I researched the types of plants that would be happy in this type of environment and with some help from Rita Randolph, from Randolph's Greenhouses a few weeks ago; I selected some that were perfect for the situation.Last week, I gathered my materials and it only took a couple of hours to put everything together.
Materials
Large water-tight container, rough grit sandpaper, paper towels and alcohol, waterproof sealer, washed pea gravel,
Containers for the plants, a handful of pennies and some copper wire, mosquito dunks, water plants and of course, water.
I purchased this antique cast iron wash kettle at an auction for $30. It had definetely seen better days, but it was solid and still held water. I estimated that it held about 20 gallons of water. Any large decorative container is perfect for a water garden; you can even purchase a liner for half whiskey barrel. They make great water garden containers. |
My kettle had been exposed to the elements, so I decided to remove most of the rust with some rough grit sandpaper. The rust will stain your water and the water proof sealer won't adhere to it either. |
After sanding off the majority of the rust, I cleaned the interior with some alcohol. This clears the rust dust out of the pits and crannies. |
Any water proofing material will work as long as it dries well and doesn't leave an oily residue. I liberated a can of automotive sprayable stone guard from my husband's shop. I knew it was waterproof and could even be painted over. But since it was already black, that saved a step.The sprayable sealer being advertised on television right now is another good choice. | Here's my kettle with a good coat of the black stone guard sprayed on the inside. I also dusted a bit of black spray paint on the exterior just to 'fluff it up' a bit. I didn't spray it solid, I just hit the worst spots and let some of the natural patina show through. | My plants were in small containers from the nursery, so I opted to repot into larger ones. These are old black nursery pots, so by recycling them, it is free and reduces trash in the landfills, a win-win situation. I mashed in one side of the pots to make it easier for them sit next to the rounded edge of the kettle bottom. |
Rita Randolph suggested that I repot the plants into washed pea gravel. She said that it cuts down on muddy water. I teased most of the soil off of the roots and filled the pots with the gravel. | The larger pots give my plants room to grow and the gravel keeps things clean and neat. | Place your water garden in its permenant home before adding the plants and filling it with water. I originally chose a spot under my crape myrtle tree, but research indicates containers need to be sited away from dropping debris. My crape myrtle will be shedding gallons of pink blossoms shortly and so I decided that wasn't an ideal situation. My garden ended up on my concrete driveway pad next to the Gronomics planters. |
Finally! The water goes in. I waited 24 hours before filling my container with water to make sure that my sealer had time to properly cure. Be sure to check the curing time on whatever brand of sealer you use.Of course, if you have a liner or water-tight contaner, that isn't necessary. My container is water-tight, but I wanted to prevent future rust. | With standing water, there is always the chance mosquitoes will lay their eggs and larvae will hatch. I purchased a packet of mosquito dunks and per the instructions, 1/4 of a dunk will protect my garden for a month. Never leave standing water without some form of treatment. Mosquitoes carry disease and preventing them is the responsible thing to do. | Algae is another problem when you have standing water. Many gardeners report that copper pennies or copper pieces will help prevent it from forming. Be sure to use pennies minted before 1983, as newer pennies are mostly zinc. In warm, sunny conditions, it may need a bit of help. I can already see the need for additional plants. The more area that is covered by foliage, means less sunlight to feed algae.There is also a commercial product made from barley straw extract that prevents algae growth as well. |
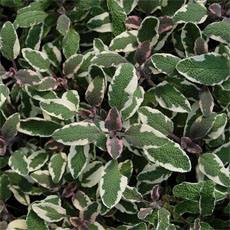
The plants I chose for my container are Scouring Rush Equisetum hymeale, Chameleon Plant Houttuynia cordata and Lizard's Tail Saururus cernuus. My plants sit about 3 or 4 inches below the surface of the water, optimum for their well being. These plants do well in containers, but reproduce aggressively if planted in a natural pond or bog area. Many water plants are invasive and excess growth should be disposed of responsibily. | Water gardens in containers need a bit of shade during the heat of the day. By placing my kettle where I did, it is shaded after 2PM. Cast iron is a great conductor of heat, so I was especially particular where I placed the it. | My little water garden is quite attractive and I'm quite happy with my choices. In the next week or so, I'll probably add another plant or two to reduce the amount of surface water exposed to the sun. There's a little bit of algae starting to form, but nothing to be concerned with yet. Besides, I think a water lily would really be attractive. Total cost was quite frugal. $30 for the kettle, $18 for my plants, $7 for the mosquito dunks (which will be enough for the whole season) and $6 for the sealer if I decide to reimburse my husband. (maybe he won't notice...) The sandpaper, pea gravel, alcohol and extra spray paint, I had on hand. Total cost, $61. |


