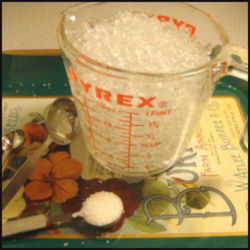
You'll need at least two or three colors of polymer clay and some tinfoil for this project. Polymer clay comes in 1-ounce "bricks" or in packs of multiple colors, easy to find at craft stores or online. The colors you choose will depend on your personal style, b ut don't be afraid to throw a really bright or even clashing color in the mix. This is a great project for using up "leftover" clay.
Although you can warm up the clay by hand, you'll be ready for the fun part of this project much sooner if you have a clay rolling machine or an old pasta maker. Run the clay through the machine at least half a dozen times to "condition" it, or work it with your hands until it's soft and pliable. Sculpey is our favorite brand, as it warms up quickly and is soft enough for kids to mold.
Combine colors by rolling clay "snakes" and twisting them together. A little snake or two in a bright, contrasting color adds a nice touch. Twist, squash into a ball, roll into another "snake" and twist again, until your colors are marbled together to your liking. Rolling the clay through the pasta machine (set to 3/16 or ¼ inch) will result in some nice streaking and mixing, too.
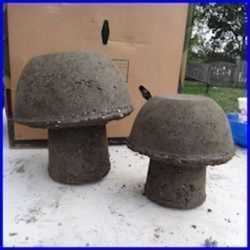
Roll or pat the clay to a thickness of 1/8 to ¼ inch, using thicker clay to make larger mushrooms. When you like the colors you see, cut or shape the clay into a roughly circular shape.  Now, give your mushroom cap some dimension. In nature, some mushrooms are tall and conical, others are
  nearly flat-topped. Our flatter caps seemed more interesting with some ripples and soft ridges. For a tall cone, you'll want to start with a half circle or a pac-man shape.
Just shaping the cap isn't quite enough; you need to support the shape while it bakes. For flatter mushrooms, a marble or bottle cap under the center may be all you need. We made ours a little taller using scrunched tinfoil tart pans and balls of foil.  You can shape your mushroom cap around pretty much any material that can take low oven heat, especially if you cover it with a bit of foil for easy release.
Follow the directions for your brand of polymer clay. We baked ours for 20 minutes at 275°F. Once cool, remove the caps from their supports. For durability, especially for outside use, give your mushrooms a couple coats of clear sealer.  Sealers made to be used with polymer clay are best; lately, we've been using "PYM II." **
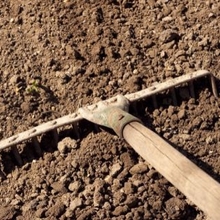
We made five mushrooms using different combinations of the same colors. Since we were using mostly muted natural tones of clay, we thought small sticks would be fine for the stems, and we had fun searching under the trees for just the right ones. Choose sticks several inches taller than you want your stems to be, so you can push them down into the soil to anchor your mushrooms.
You can also make matching stems from polymer clay. The clay bakes better if it's not too thick, so form the stem around something. For the stem we made this way, I wrapped a pipe cleaner around the top of a stick from a broken pinwheel and then squashed on a layer of multicolored clay.
Whether you go for subtle colors and realistic textures or simple shapes and neon swirls, it's easy to put your own stamp on this project. You're going to love how easy and fun it is to make a little flock of mushrooms for your container garden or indoor plants. Post some photos, and let us see your creations!
 |
* Polymer clay isn't safe to eat, so I wouldn't try this project with really young kids. (My daughter is almost 3 and no longer eats play-doh.) If you use a pasta machine or other tools on polymer clay, don't use them later with food. Polymer clay can give off some fumes (a mild odor) and leave a residue when fired, so work in a ventilated area and cover your baking tray with foil or parchment paper.
** Thanks to my creative friend Chris Rentmeisters for recommending PYM II sealer. It's the best I've ever used, and it's what she uses on her Garden Buddies. For product details & purchasing, see the Precision Blue site.
Project photos by Jill M Nicolaus. Mouse-over images for additional information: just hover your cursor over the photo for a few seconds, and a caption will pop up.