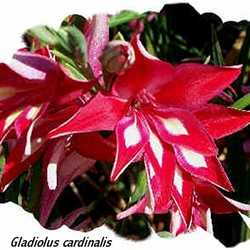
Glads are one of my favorite flowers, dating back to my childhood and the Gladiolus fields of Southern Oregon. In June, the fields south of town exploded into rows of rampaging color and heady fragrance, kicking off the annual Gladiolus Festival. Today's hybrids are more magnificent and hardy than the old-timey varieties, and I think every garden should have at least a small grouping of Glads. Over 260 species exist in this genus of the Iris family (Iridaceae).
The North American Gladiolus Council1 recommends making your first planting "when you would normally plant sweet corn in your area." If you plan carefully, you can plant a batch every two weeks and keep the display going until early fall.
Gladiolus prefer full sun, but can tolerate some light shade in early morning or late afternoon. These plants can grow to a height of 36 - 60", so they do not fare well in windy areas; even staking does not prevent wind damage. Water at least 1" a week; soil must be well drained or corms will rot. Glads tolerate a wide range of soil types, but do best in soil with a pH of 6.7-7. If soil tests indicate low nutrients, apply 5-10-10 fertilizer into the planting trench before placing corms. Do not over-fertilize! Additionally, to prevent any chance of insect damage, apply organic insecticide to the trench. Plant corms 3 - 5" deep and 4 - 6" apart.
Because of their tendency to fall over, plan to stake each plant. Placing the stake at the time you seat the corm allows the plant to be supported as it grows, and you won't damage the roots by trying to place the stake after the plant has emerged.
Managing Gladiolus
 Though Gladiolus bulbs are not high on the favorite menu of rodents (tulips and crocus being at the top), they are still attractive. I found several methods for protecting your corms and bulbs until they become established. The easiest method is dipping them in a commercial solution that makes them smell and taste bad; Bulb Guard® and Ropel® are two such products. Other ways of discouraging squirrels and chipmunks from digging up your bulbs is to cover the planting area with chicken wire or hardware cloth, then cover it with soil. Old window screens can also be used, as well as boards or planter saucers.2 After a few weeks, the "new bulb" odor will disappear and you can remove the protectors.
Unless you live in Zones 8 to 10, Gladioli do require a little extra attention at the end of the season. The corms need to be dug, dried, and stored for the winter. Some gardeners believe it's just easier to buy new ones every season, but I have favorites that I cherish, so up they come. Corms are bulb-like structures, shaped somewhat like a chocolate kiss; the tender part is protected by several layers of papery, fibrous material known as the husk. After the plant has finished blooming, the corm draws nutrients from the leaves, just as tulip and hyacinth bulbs do. I cut the leaves back to about half and allow the plants to stay in place until early October before the onset of freezing (here in Ohio). After digging the corms, I shake off excess soil and lay the stalks/corms out in a single layer to dry for about 10 days in a protected spot. (Here again, remember the rodents!) 
I again shake off any remaining soil and cut the leaf stalks back to within 3-4" of the corm, then place everything in a large rubber livestock feed pan and put it in the garage for 3 weeks to finish "curing" the corms. This step is important - if the corms are damp or have moist soil attached when you store them for the winter, you'll have mush in the spring.
When the corms are completely dry, the stalk will break off easily. On the bottom of the corm, you will see a corky layer, which is the old "mother" corm and roots; you will also see little baby corms called cormels. Remove these and discard. Be careful to leave the husk on the corm. The cormels can be used for propagation, but will take several years to reach flowering size.
Store the corms in mesh bags or open paper bags; do not cover them and do not place them in air-tight containers. Store them in temperatures between 35 and 58 degrees - the lower temperatures are better. Check occasionally during the winter to see that none have rotted or dried up; if you find any, discard them.
Thrips are the biggest problem with Gladiolus. Streaky leaves, misshapen or streaked flowers, or blooms that start, but never open are all signs of thrip infestation. These tiny (1/8") insects are tan or black and over-winter on stored corms. Control of thrips is best done at the storage stage. Cold storage temperature is very important; the insect cannot survive in temperatures between 35˚ and 40˚F. If you've found thrip damage on your plants, you can either discard th em and start with new ones, or try one of the following non-chemical controls suggested by University of Minnesota Extension.3
- Place an ounce of mothballs or naphthalene flakes in a paper or cloth bag, then add up to 100 corms. Store as you normally would.
- Soak for 6 hours in a mixture of 4 teaspoons household disinfectant to 1 gallon of water. Allow to dry thoroughly before storing.
- Dip corms in very hot water (160˚F) for 2 minutes, then allow to dry before storing.
1 North American Gladiolus Council http://www.gladworld.org
2 “Bulb Barriers,” Meleah Maynard; Gardening HowTo, Sept/Oct 2007, p. 34.
3 Yard & Garden Brief: Growing Gladiolus http://www.extension.umn.edu