Seed Starting Mix
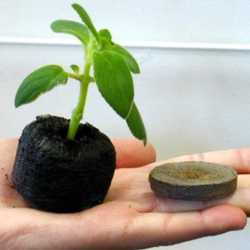
No, I'm not the first one to discover a new fangled, fantastic, cheap seed starting medium, unfortunately. I just want to start by pointing out that seed starting mix is one place you shouldn't skimp or cut corners. Seed starting mix should be light weight and sterilized to allow delicate seedlings to grow. Whatever you do, don't start seeds in cheap potting soil! Boy, did I learn that the hard way. After years of problems with germination and damping off due to the wrong medium, I discovered that I have very successful results with peat pellets every time. Of course these are not the only way to successfully start seeds, but my success rate is so high with peat pellets that in the end I feel I save more money and trouble. Peat pellets can be purchased locally or online for about 25 for $3.

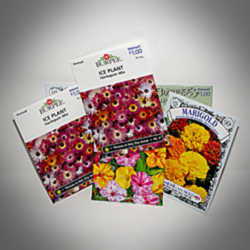
If you don't want to use peat pellets you can also buy or make a seed starting mix. Soil-less seed starting medium can be bought pre-mixed at garden stores for $4-6 per small bag. You can also mix your own seed starting medium. There are lots of recipes around but a good one to try is:
1 part Perlite
1 part Peat Moss
1 part ground Sphagnum Moss (1)
In the end, mixing your own medium can be a good way to get exactly the amendments you want in bulk amounts. Again I repeat: Do not cut corners on your seed starting medium! Now to the penny pinching.
Seedling Labels
Trays of germinating and sprouted seeds can get mixed up faster than you can say tomato (to-MAY-to or to-MAW-to?). As an urban backyard gardener, I do not start enough of any one seed to fill up a flat. I usually start about 3-10 peat pellets of each seed. Every year I tell myself that I will label, label, label and every year I do and then promptly rearrange my seedlings in an excited frenzy and poof! All my good intentions go down the drain. And I don't care how many seedling identifying sites you send me, cotyledon leaves all look alike!

To avoid this frustrating self-induced phenomenon, I make flags for each peat pot using a pine needle and tape. Now I call that cheap! The pine needles even come with a handy, sharp end that acts like a stake when carefully put into each pot. I find clear tape doesn't cast shadows to block out light for other seedlings. If you don't have a source for pine needles, let me send you some of mine! But seriously, a one dollar box of toothpicks would work just as well.

Now obviously these labels are not very sturdy, so I do not expect for them to last once I plant my seedlings outside. Having each small seedling labeled is a sure fire way to keep my seedlings unconfused. It is especially helpful for keeping organized when I sow more than one cultivar of a plant such as tomatoes and Cosmos.
Paper Pots
I don't know who came up with paper pots, but they are my favorite addition to my thrifty gardening repertoire this year. Our one and only Dave Whitinger explains the process of making paper pots in this video. I'll warn you, he makes it look easier than it is.


Instead of buying a mid-size level of pots for my seedlings in between peat pellets and the ground, I am using these paper pots. Even just one newspaper should last several seasons of making these inexpensive pots. I have also found that using different size cans such as family-sized vegetable cans and smaller tomato paste cans broadens the range of sizes I can make. How much easier and cheaper does it get than that?
Lighting and Heating
After years of doing it the stubborn way, lining up my seedlings as close to windows and every table lamp I could, leggy seedlings finally broke me down. I needed seed lighting. There are many plans for inexpensive seed starting shelves made from PVC and shop lights. This is a great alternative to buying a specialized shelving unit and grow lights; however this was still beyond my budget.

Instead, I had to come up with an even cheaper lighting scheme. Shop lights are inexpensive at hardware stores- roughly $9 for a 4 foot, 2 bulb shop light and $6 for each bulb. A nifty trick I learned from my mother is to prop the shop light up on bricks about 2 inches above your seedling tray. As the seedlings grow, add a brick to each side to raise the light. No chains or fancy shelving needed.
Providing heat for germinating is integral for success with many seeds. There are many cheap alternatives to heat mats. A technique that has been most successful for me is to buy an inexpensive plastic greenhouse (about $4 at local home improvement store) and place them closely under flood lamps. The lamp heats up the environment within the plastic box creating an ideal climate for seeds to grow.

I keep the lamp far enough away that it doesn't heat up the plastic itself, just the air inside. True, I can't control the temperature with a thermostat, but so far I have had resounding success. I also have been known to put a flat of seeds on top of my forced-air heating vents in the floor, which I've found is a great way to keep a little warmth underneath the seeds, though it's not that consistent. There's also the method of putting seed flats on top of the refrigerator, which I also find to be a little hit and miss.
Overall, seed starting can be so fulfilling and in the end, almost free. Why pay big expensive greenhouses to grow your plants for you, when it's easy and cheap at home!
When you purchase through links on our site, we may earn commissions at no cost to you.
1. http://www.scribd.com/doc/2149325/Seed-Starting-Soil-Mixes?page=1
All images are copyrighted to Susanne Talbert